A Screenshot is also known as a screen capture or screengrab, or screencap. It is an exact copy of the image that displays the content of the PC show. Screenshots allow catching accurately the thing a person is seeing on its screen to reference later or impart to other people.
There is no better way to show someone what exactly you are talking about when you can show them your screen. Most people nowadays must have taken a screenshot or need to take one for any use.
Screenshots, most of the time, works as artifacts of the new era. Last year, Windows 10 updated and perfected taking screenshots – which is shocking how long it has taken!
Its work is not limited to proving your point to someone but also helps you keep your past displayed things saved for the later period.
However, even though it is one of the most basic tasks, there are multiple ways to take a screenshot on Windows 10.
In this post. We’ll be showing you how to take screenshot on Windows 10 using 6 different methods.
There are multiple methods you can use to take screenshots on your Windows computer but still many people are unaware of it.
So now let’s take a quick look at those methods and see how you can easily take a screenshot on Windows 10.
How to Take Screenshot on Windows 10 Computer or Laptop (6 Easy Methods)
Microsoft has long been improving the overall Windows 10 experience with useful apps and new features. Windows 10 is a great operating system for both professionals and beginners.
We’d say that one of the best improvements Microsoft brought with Windows 10 is the updated screenshot tool.
Every individual using Windows 10 has long wanted better annotation and screenshots tools, and Microsoft is making them available.
This article will tell you all about the old and new ways to take screenshots on Windows 10. Also, we will also share some great third-party applications that can save you a lot of hustles while taking screenshots.
1. Use The Snipping Tool
The Snipping tool is one of the oldest tools to take a screenshot that has been present since Windows Vista’s days.
Even though this tool has been removed from the list of apps in the Start menu, individuals can still easily access it from the ‘Search Bar.’ To take a screenshot, you need to follow the given steps:
- Open the Snipping Tool
- Click on the “New” button every time you need a new image
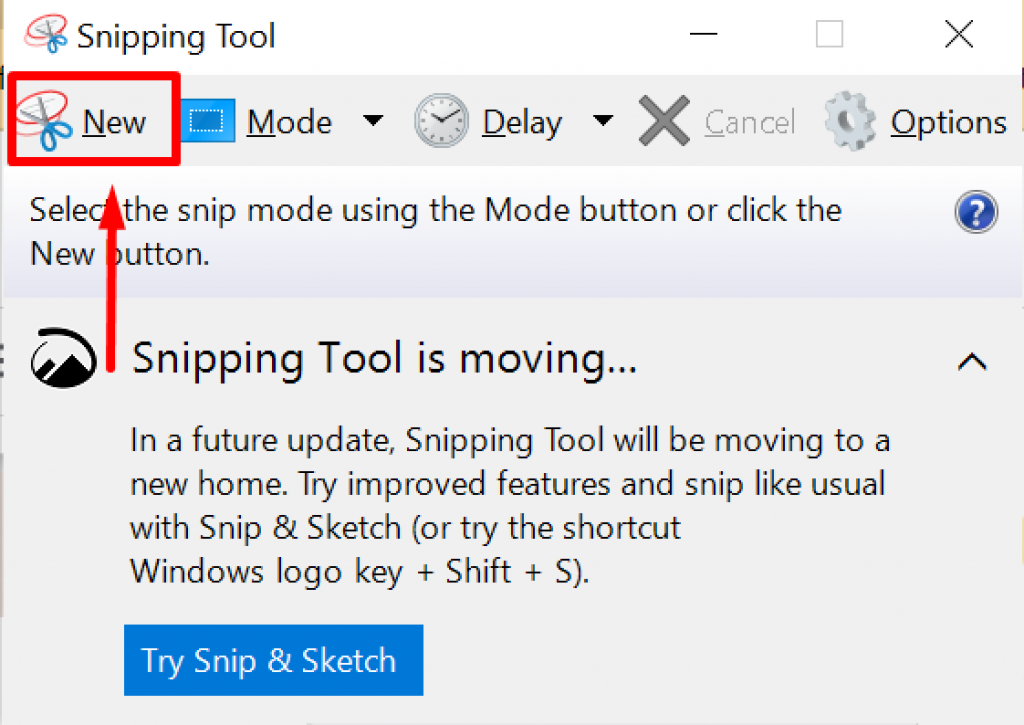
- With the help of the snipping, the cursor selects the area you want to snip by pressing the right key of the mouse. Leave the cursor once you cover the area you want to snip.
Note: you need to save the screenshot every time you take a snip as the snipping tool does not automatically save your screenshot but must be done manually before your exit.
2. Print Screen (PrtSc)
A Screenshot can be taken by the simplest method: the Print Screen button on the keyboard. You can copy it to the clipboard for pasting into any application or save the screenshot as a PNG image file.
You can find the Print Screen key on the keyboard located near F12 or Fn and Scroll Lock key on the full-sized keyboard. It may be referred to as “PrtScn”, “Print Scr”, or “PrntScrn”. This key is usually present on the top row of the keyboard.
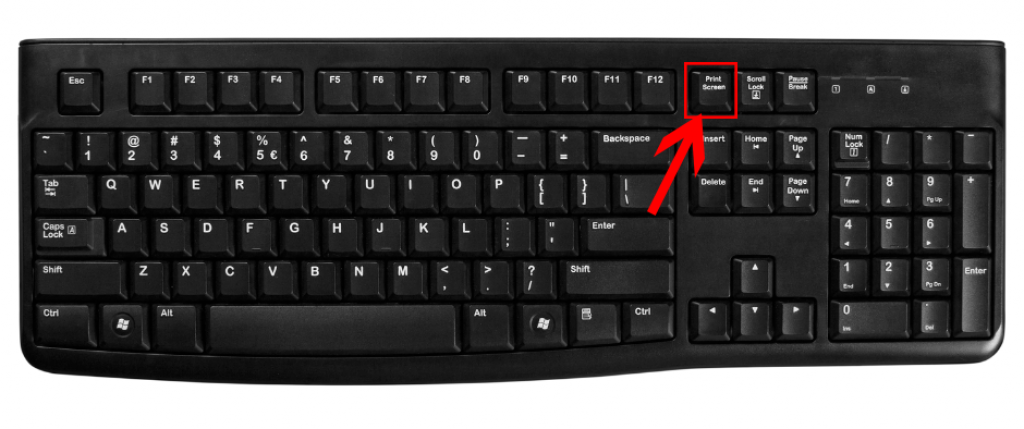
Some keyboards (laptops especially) may require you to activate the print screen with a function key (that is, hold down the function key and then press PrtScn). There are several variations of taking screenshots by using “PrtScr”, which are given below:
-
Using the “Print Screen” key with ‘Clipboard’
To take a screenshot of only one window, not the entire screen, click Alt + Print Screen. (Instead, on some laptops, you may have to click Alt+Fn+Print Screen.) To your clipboard, Windows will save the image of the current window, so first, select the window you want to take a screenshot of. Use “Alt+Tab” to focus it, or you can click anywhere in the window.
Adding “Alt” along with “Print Screen” copies the active rectangle from the window. You will need to take the additional step of opening and saving the image in an image-handling application, such as Paint 3D, Paint, or even Photoshop (unless you use the tips below). Just paste Ctrl+V when you’re in a new document in one of these apps, then you can go into town to edit and finally save the image in a folder of your choice.
-
Using the “PrintScreen” key with ‘OneDrive’
This is one of the best Windows screenshots ever in 2015. Like the normal old “Print Screen” button, you can save the entire screen or active window with Print Screen or Alt+Print Screen.
However, once you have entered the OneDrive settings window and selected the Save screenshots / Record to OneDrive option on the Backup tab, you don’t need to open the drawing app. Paste it into the clipboard, and then save the file. Just click the “Print Screen”, and you will have an image file saved, all in just one step.
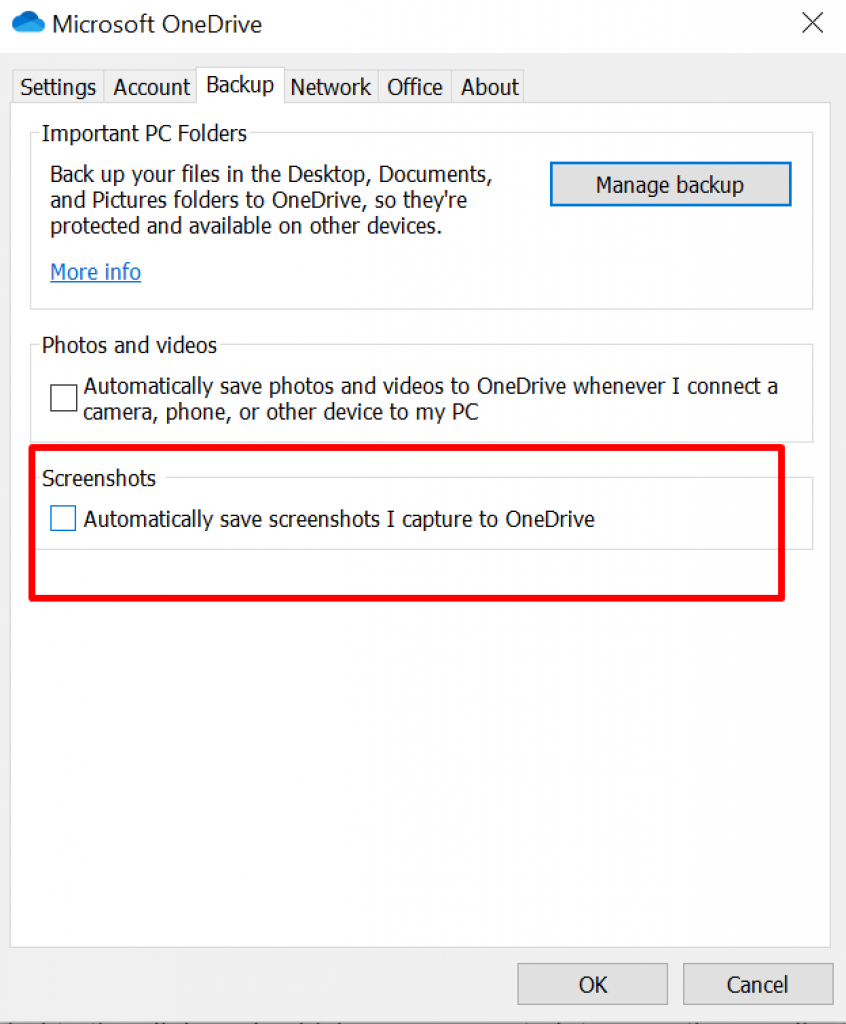
The Windows Action Center will let you know that your screen capture has been saved, and by clicking on the notification, you will go directly to the folder where it is saved. If you use this method often, you may want more cloud storage than just the free 5GB.
3. Use Snip & Sketch
One of the easiest and best ways to take screenshots on a Windows 10 laptop or computer is the Snip & Sketch option.
Press the Windows Key+Shift+S key combined.
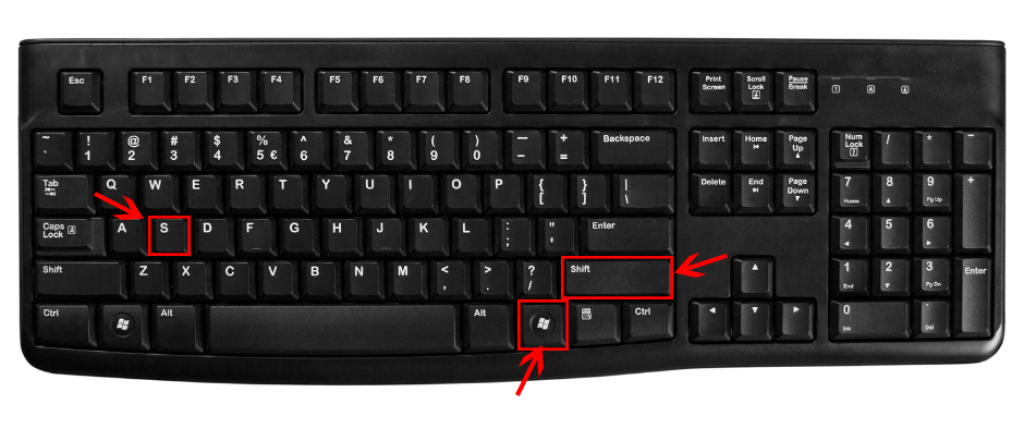
And you will have the option to capture or screenshot in rectangular, full screen, freely selectable mode, or a single program window.
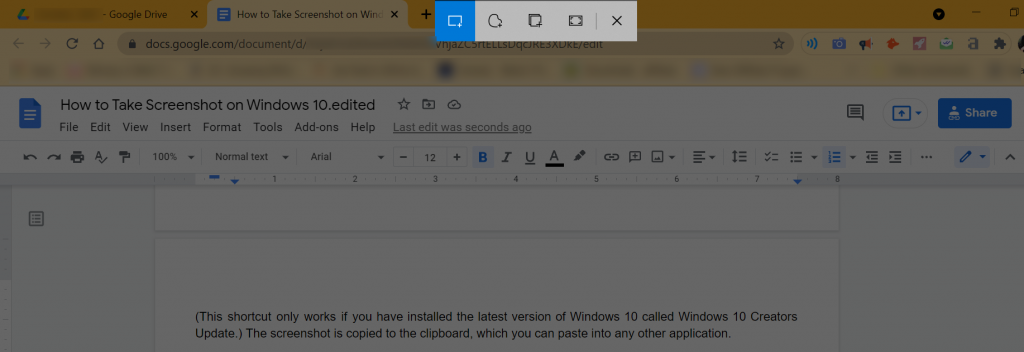
Another way to access Snip & Sketch is to use the Crop button on the Action Center screen. After clicking these keys, you will see a little notification in the thumbnail view in the bottom right corner for a moment mentioning that the snip has been saved to the clipboard.
Click on that to open the Snip & Sketch window. In this way, you can mark images with highlighters, pencils, erasers, pens, cutting and ruling tools. You can then save the image in a folder wherever you want or share it using the standard Windows sharing menu.
That way, you can send the image to Mail, Messenger, Instagram, or any other app that accepts these types of files. It also allows you to send it to a nearby computer that has sharing enabled.
Some of the things you would like Snip & Sketch to have are text overlays and basic shapes, including arrows which are always handy. If you want to use this tool, you can go to the Windows Settings app, select Easy Access, and use the Print Screen key to open the screen capture. Note: this action will require restarting your Windows.
4. Windows Key + Print Screen
The super-easy way to take a screenshot in Windows 10 is with a keyboard shortcut.
It was introduced with Windows 8 and still works in Windows 10. The ‘Windows’ Key + ‘Print Screen’ keyboard shortcut instantly darkens the screen to show you that it’s working. It immediately saves the PNG image file in the Photos (Screenshots folder). It is easier than most of the other ways in this article.
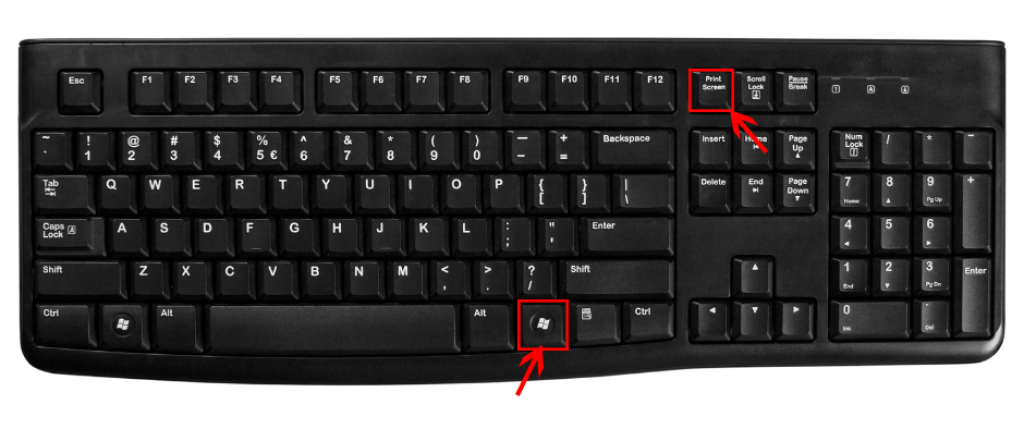
Windows Key+Alt+PrtScr only saves the active window, but it takes advantage of the Windows Game Bar functionality by saving your screenshots in the Capture or Video folder. Both methods are great if you want to start saving right away without dealing with the OneDrive cache or clipboard.
5. Use a Third-Party Software
The article discussed how to take screenshots without using third-party applications in Windows 10.
However, suppose those options limit you, and you want a more advanced tool for taking screenshots or capture screens. In that case, there are some great third-party applications available for taking screenshots easily on Windows 10 with added features.
Snagit is one of those third-party applications which is best for taking screenshots of the displayed screen on Windows 10.
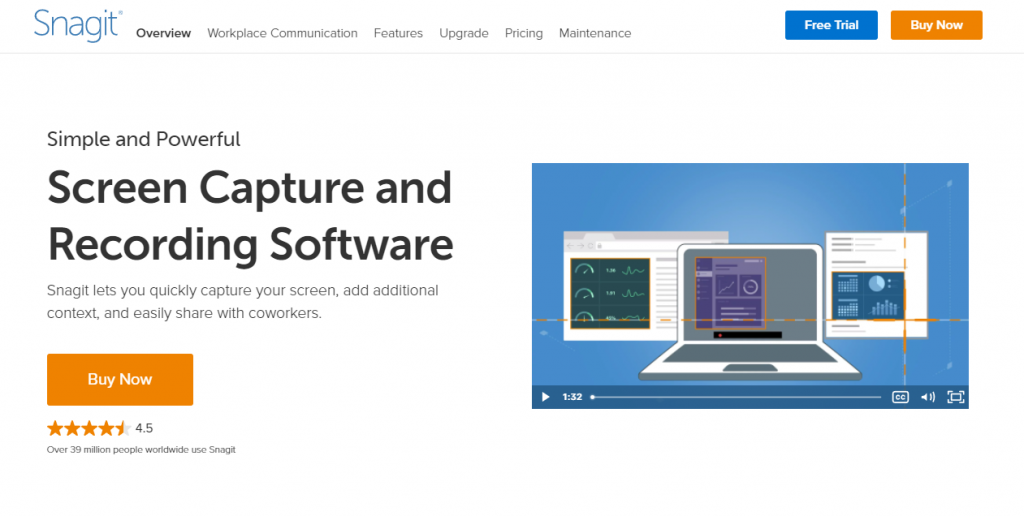
Snagit still has at least one big advantage over Windows’ built-in screenshots: you can undo it yourself, and all your photos will remain in the utility’s repository, always available when you need them later. This is the least destructive way to capture the screen while you continue your work. Once you are ready to edit your photos, you can view the history and save the images you want in a folder of your choice.
Snagit also includes powerful tools like scrolling and video tools. It provides useful tools for editing and drawing images, including text overlays, brightness, and frames and arrows.
The Snagit license will set you back $49.95, but for those who need its advanced features, it’s well worth the money.
6. Use XBOX Game Bar
Xbox Game Bar is a great feature of Windows 10.
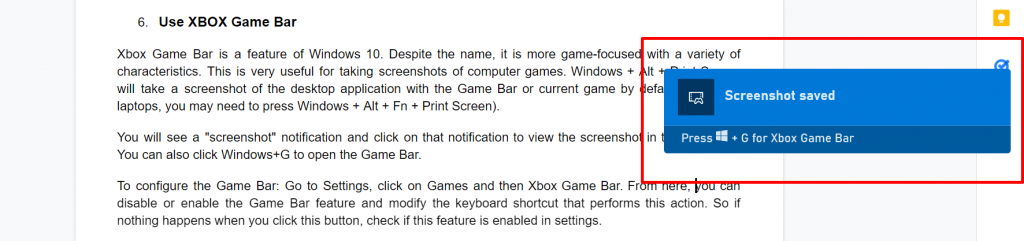
Despite the name, it is more game-focused with a variety of characteristics. This is very useful for taking screenshots of computer games. Windows + Alt + Print Screen will take a screenshot of the desktop application with the Game Bar or current game by default (On some laptops, you may need to press Windows + Alt + Fn + Print Screen).
You will see a “screenshot” notification and click on that notification to view the screenshot in the game bar. You can also click Windows+G to open the Game Bar.
To configure the Game Bar: Go to Settings, click on Games, and then Xbox Game Bar.
Or you can also directly search the Game bar from the windows search bar.
From here, you can disable or enable the Game Bar feature and modify the keyboard shortcut that performs this action. So if nothing happens when you click the shortcut buttons on your keyboard, check if this feature is enabled in settings.
The screenshots you take with this tool will be saved in the C drive of your PC.
Game Bar also allows you to record videos on your Windows 10 screen; you can even use it to record videos on your desktop or other apps. And the video files will be saved in the C drive folder in MP4 format.
Conclusion
Besides being useful, screenshots are revolutionary for getting more work done faster. This is especially useful when you need to demonstrate something difficult to describe in words. Screenshots help you pinpoint exactly what you’re talking about. And that means less time to explain, less confusion, and more time in the day.
Providing a visual example of what you saw will help others see exactly what happened and identify what may have gone wrong.
As Buffer notes, screenshots are powerful but easy to use. It only takes a second to take a screenshot.
I hope now you know how to take screenshot on Windows 10 and you can use the methods mentioned on this post to easily capture a screenshot of your screen.
It’s easy like a cakewalk.
Now it’s your turn:
What method do you usually use to take a screenshot on your Windows 10 computer? Let us know in the comments below.


