Screenshots help capture some necessary information, which can be used later on. Cropping a screenshot on a Mac can help define something if you cannot describe it precisely. For better instances, sometimes, drawing over the screenshots can strengthen the entire process for future use.
Unlike other platforms which provide a dedicated “Print Screen” option to capture your screen, Mac does not have any such button. And that creates a lot of confusion amongst new users. However, Apple makes up for that by employing plenty of user-friendly tools to capture a Mac screenshot, from several short keys to built-in apps.
You can share screenshots to show your friends or family how to effortlessly activate new Mac software, services, or anything else.
In this article, we are going to show you how to take screenshot on Mac because we understand that “Pictures express more than words.”
Keep on reading this article to learn more about the available Mac functions to take a screenshot efficiently.
How to Take Screenshot on Mac?
We are going to list down the essential steps to be used to take a screenshot in Mac. Mac screenshot processes are divided into 4 segments. Let’s dive into each of them one by one.
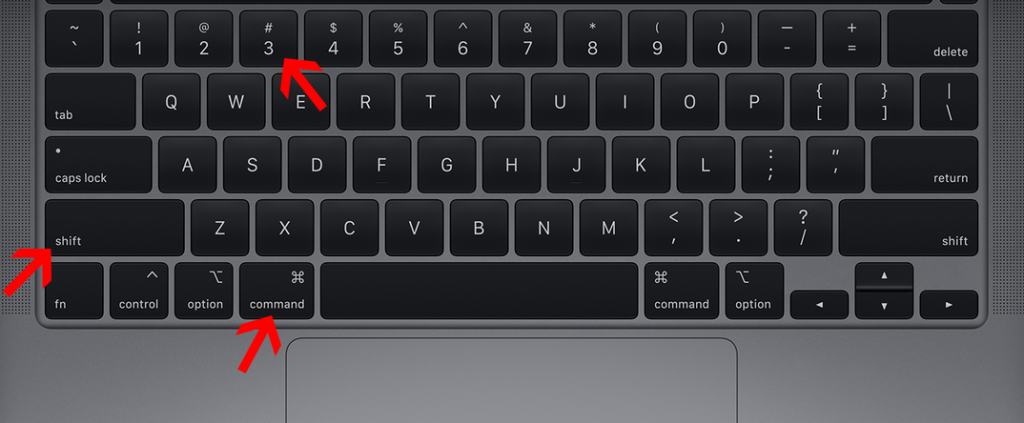
Catching The Entire Screen Using (Shift + Command + 3)
To start taking screenshots, you need to use these three keys (Shift + Command + 3). If you want to take a screenshot of your entire screen, you will only require these keys. Let’s move to the next step.
Step 1
Press and hold these three keys together: Shift, Command, and 3. The desktop will automatically capture the screen. Be sure that you are pressing all three keys at the same time
Step 2
Once you are done with Step 2, you will see a thumbnail at the bottom left corner of your Mac. If you want to edit the screenshot, click on that thumbnail, or you can wait for some time, the screenshot will automatically be saved on your desktop.

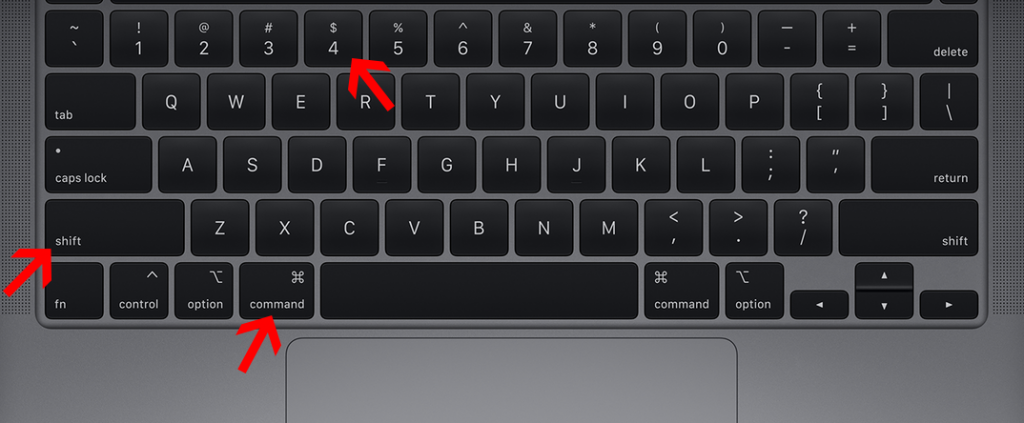
Catching A Specific Area Using (Shift + Command + 4)
Here, if you want to capture any specific part of the screen, you need to use these three keys (Shift + Command + 4). Let’s move further to know more.
Step 1
To capture a specific portion of the screen, you need to press and hold these three keys together. Again, you need to press all three keys at the same time. If you miss this, the screenshot function will not work.
Step 2
When you press (Shift + Command + 4) your pointer will turn into a crosshair to select the area of the screen to capture for a screenshot. Now, to move the selection, press and hold the Space bar while moving the crosshair.
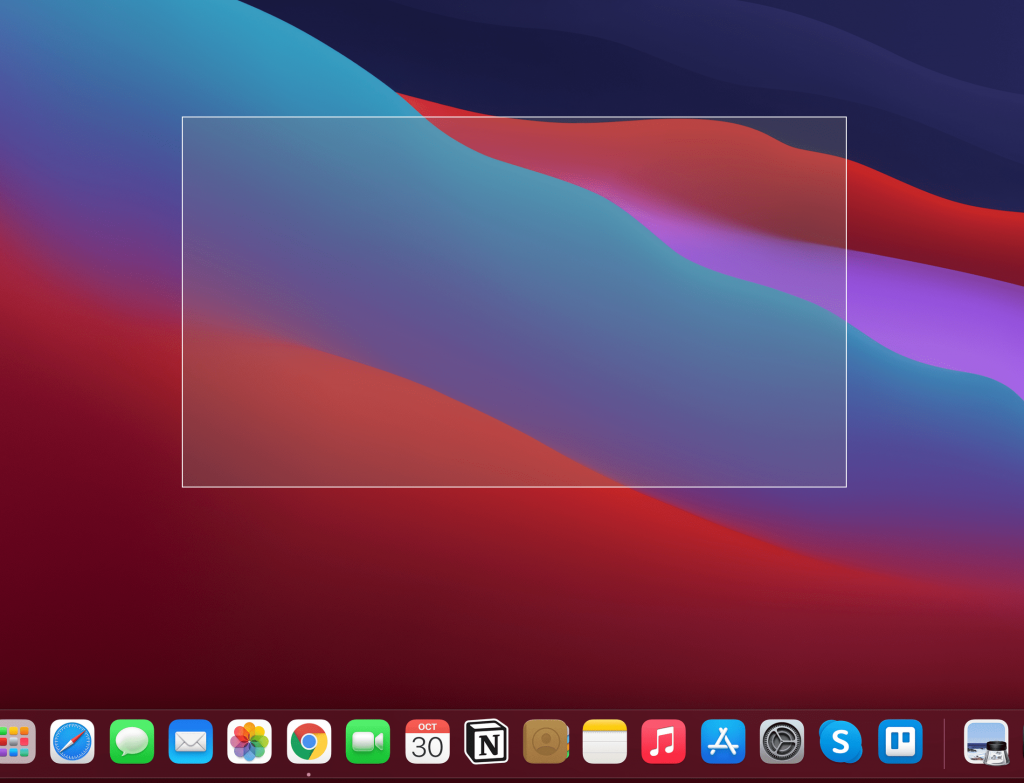
Oops, if you have selected the wrong portion, do not worry. You can cancel the recent screenshot by pressing the ESC (Escape) key. That simple it is!
Capturing A Specific Window (Shift + Command + 5)
If you want to capture a specific window, you should focus on three keys; Shift, Command, and 5. Let’s see how you can capture your desired part of a window.
Step 1
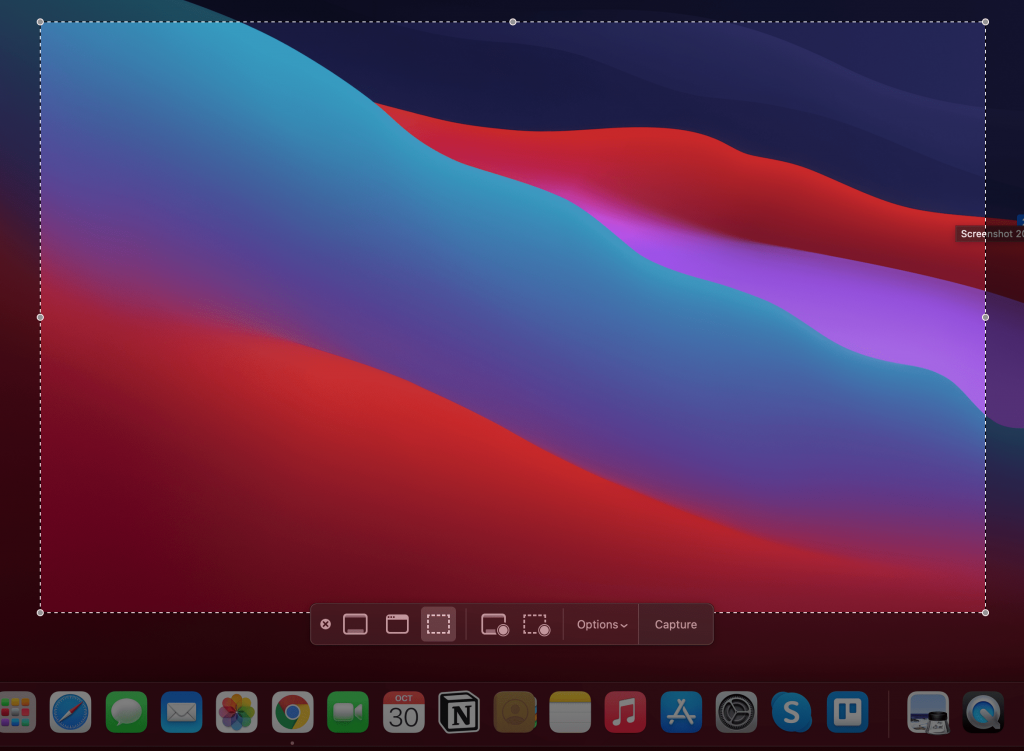
To view the screenshot toolbar, you need to press all three keys (Shift + Command + 5) together.
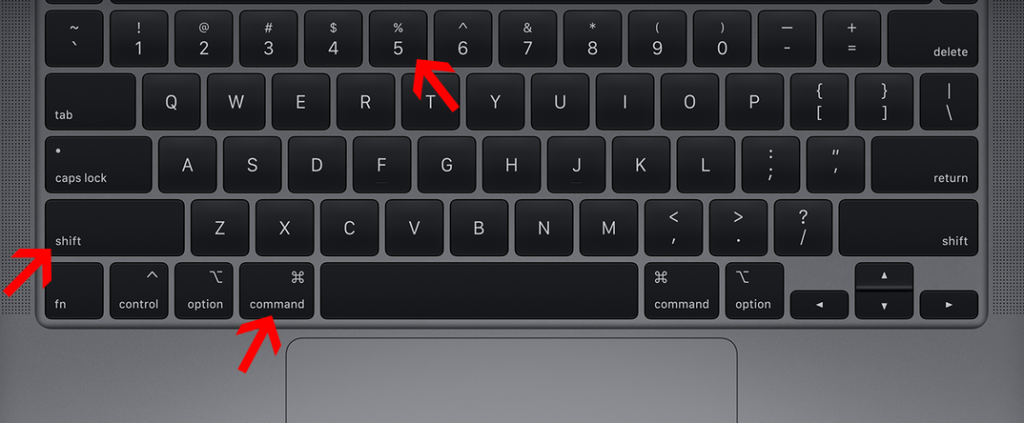
Once you do that, you will see onscreen controls for recording a selected portion of the screen, recording the entire screen, or capturing a still image of your desktop’s screen.
Step 2
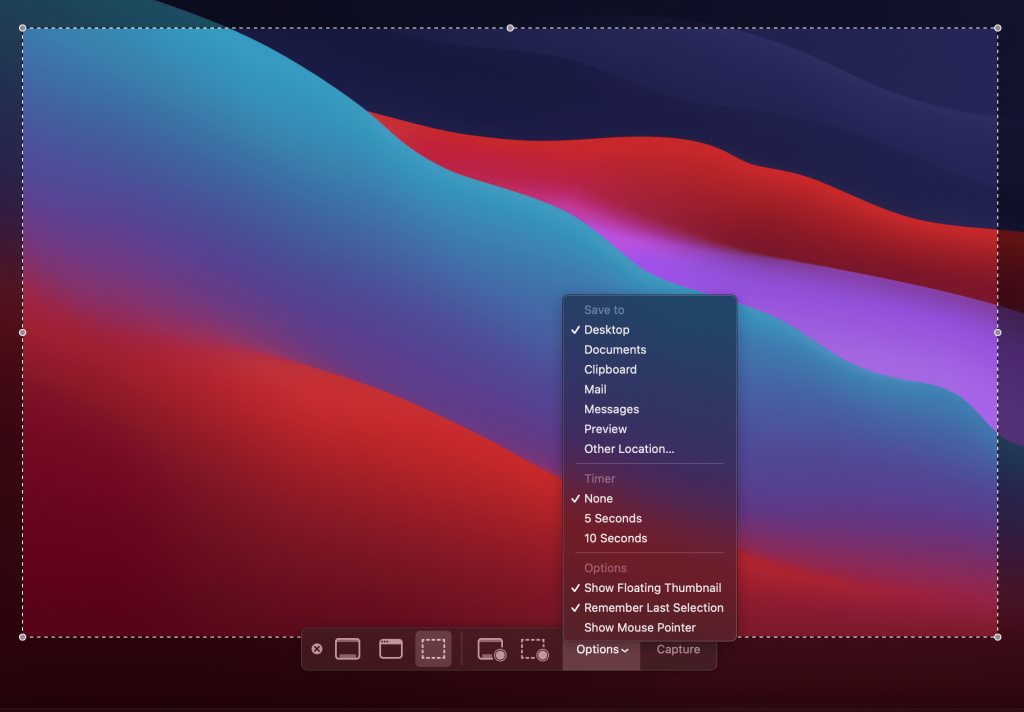
If you want to see other features, just click on the “Option” Menu on the onscreen toolbar. You can set a specific time for taking a screenshot. Choose these features and take screenshots in Mac as per your requirements.
Where is The Screenshot Saved on Mac?
As you have learned how to take a screenshot on Mac using different key combinations. Now, you must be wondering where these screenshots will be saved?
At this point, we are going to discuss the location from where you can find captured screenshots whenever you need them.
By default, when you capture a screenshot, it’s given the name “Screenshot” followed by the date and time on which it was taken. Initially, It is saved on the Desktop.
So to access the screenshot, you just have to search on your Desktop or open a Finder app, choose Desktop from the sidebar, and look for the screenshot there.
Why Can’t You Screenshot on Mac?
This is a very common problem with many Mac users, they use everything on-point but are still unable to take a screenshot on Mac. Under this heading, we are going to target one potential cause why the screenshot feature is not working on Mac?
To resolve this problem you need to follow the points mentioned below:
First, you need to shut down the Mac, then turn it on again. Now, push a screen capture as indicated by your liked strategy, regardless of whether it’s console easy routes or the Screenshot application.
Once done, check the desktop’s screen capture console easy routes. For viewing it more precisely, go to System Preferences > then click on the keyboard > Apply shortcuts.
Note, with MacOS 10.15, Apple came up with new security and privacy features for your Mac. In terms of taking screenshots by using Lark, you need to give Screen Recording permission to Lark to keep things moving smoothly.
Conclusion
For new Mac users, these tiny issues can look way bigger than anything.
But, everything has an easy solution, with this tutorial, we have also tried to provide you with the best solution for your screenshot-related issues.
We hope that you have gained a good amount of knowledge out of the above content.
Apple is constantly upgrading its security and features, to be at par with them, you need to keep a track of its latest activities.
Otherwise, you can face a bit of difficulty in using old or new Mac software.
I hope now you can easily take screenshots on your Mac without any issue?
Now it’s your turn:
Which method do you personally use to take screenshots on Mac? Let me know in the comments below.


