If you’re an active user on Instagram, chances are you’ve come across tons of reels and stories where people are hysterically crying!
No, those people haven’t got crazy!
They’re just following a viral trend on social media- The crying filter. It is one of the most popular filters on social media that makes your face look like you’re about to cry but in a funny way!
Not only on Instagram, but the crying filter is also trending on Snapchat and TikTok as well.
Everyone is using this effect, from celebrities to influencers, to entertain their audience and make them go ROFL!
How can you use that filter?
In this post, we’ll show you how to use crying filter on Instagram in the easiest way possible.
So without wasting any further time, let’s dive in.
What is Crying Filter on Instagram?
The crying face filter on Instagram originally made its debut on Snapchat. And in no time, the filter became a hit, and users started to share it on multiple platforms like TikTok and Instagram.
Till now, Snapchat users have used this filter over 1 billion times.
Applying this crying filter to your face can make your eyes appear watery, burst into heavy tears, and make your nose run wild. And this bawling looks extremely funny on camera.
The best way to use the crying filter is to apply it to a friend’s face who has zero idea about what you’re doing.
After activating the filter, you can point the camera at your unsuspecting family or friends and wait for the filter to give their faces a bawling expression! And if they become confused, the video will create a more fun look.
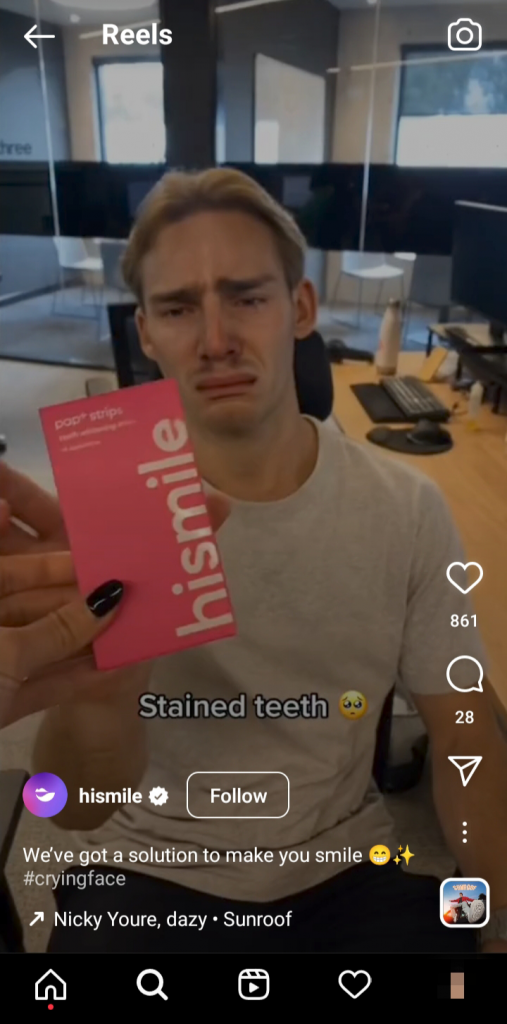
Here’s how a Smilecare brand Hismile uses the crying filter effect to promote their products on Instagram:

How to Use Crying Filter on Instagram
There are multiple new crying filters on Instagram. You have to browse these filters and choose one according to your preference. When selecting, make sure to use a filter that is hilarious and looks natural on the face.
Here’s a step-by-step process that shows how to use the crying filter on Instagram:
Step 1. Open the Instagram app and head to your profile,
Step 2. Once you’ve opened the profile page, tap on the + icon on your profile picture to add a new Story.
Step 3. Now on the Add to Story tab, tap on the Camera icon to open the camera.
Step 4. You’ll notice multiple Instagram filters at the bottom of the screen. Here you won’t see the crying filter as it is user created. You have to search for it.
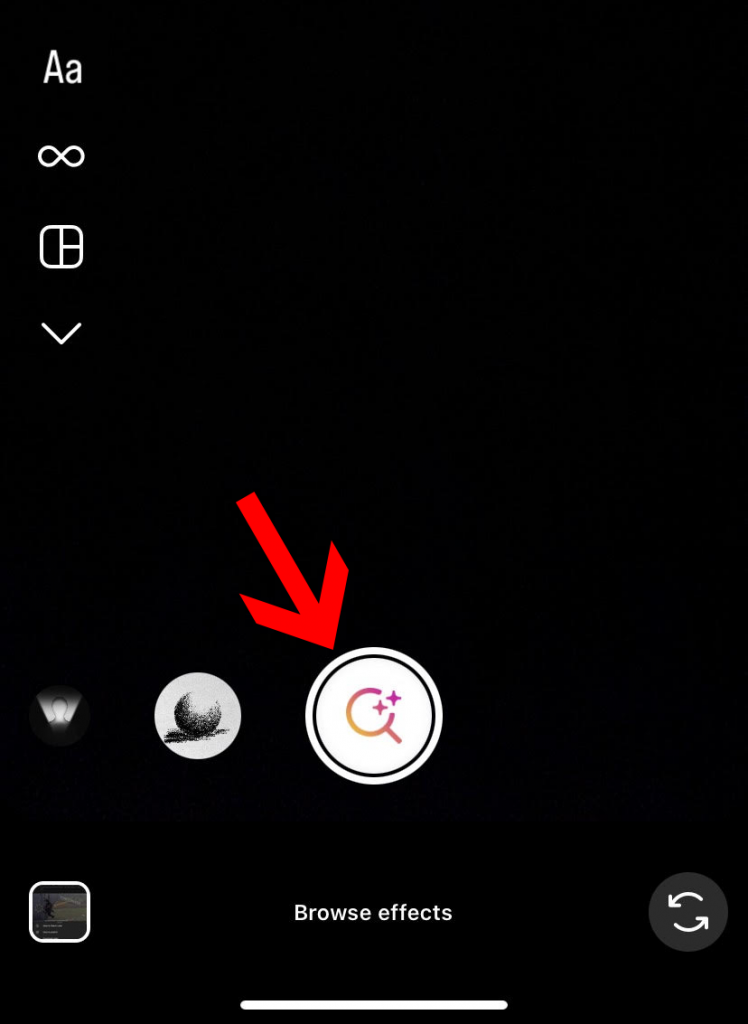
Step 5. Next, swipe all the effects to the extreme left until you find the Browser Effect button.

Step 6. Tap on the Browser Effect to open the effect gallery. In the gallery, you’ll see several filters.
Step 7. Search for the crying filter by typing “Crying” on the search tab.

Step 8. You will see different crying filters created by Instagram users. Scroll down and tap on an effect you liked the most.
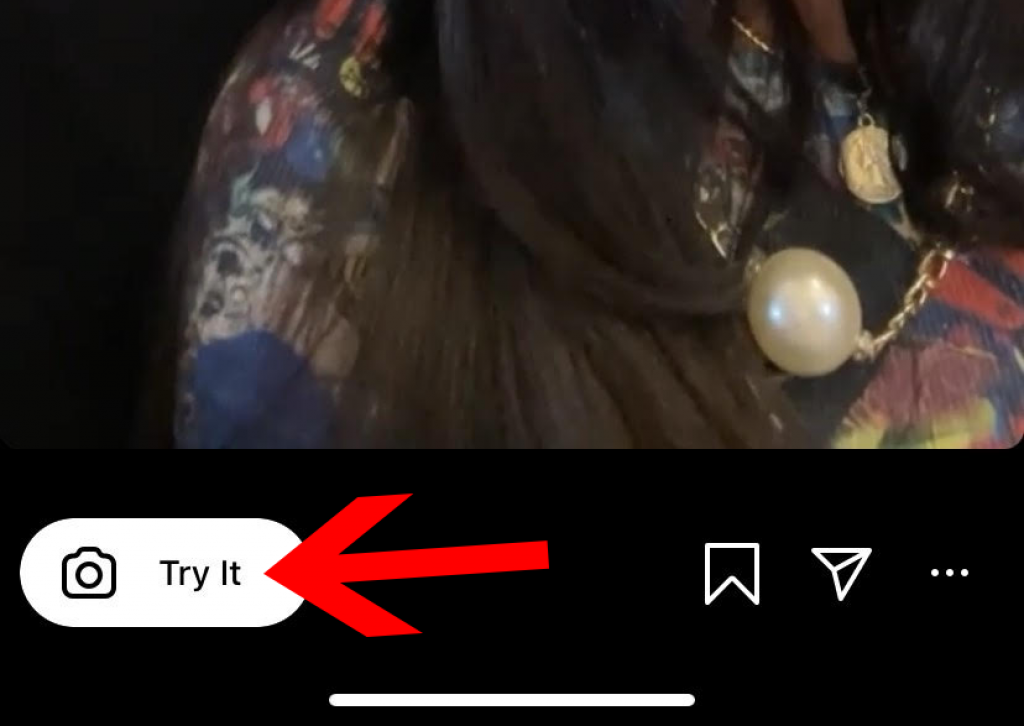
Step 9. Now tap on the Try It button to apply the filter on yourself or someone else’s face.

That’s it! Now start recording the video and share it on your feed. Or, perhaps tag it to a friend who had no idea how you’ve put that crying effect on their face in a hilarious way!
Wrapping Up
Now you know how to apply a crying filter on Instagram, go ahead and start using it!
Apart from Instagram, you can also use the Snapchat lens as it has the original crying face version.
You can record a video on Snapchat using this filter, save the video, and later share it on other social media platforms like Instagram and TikTok.
After all, most videos you see on Instagram reels or TikTok are directly recorded from Snapchat, as the Snapchat version of these filters is more accurate compared to Instagram.
However, in the end, it is completely your call to choose which filter looks best on your face.


